

Sherman
USA Normandía
Hace bastante tiempo que tengo por terminar mi ejército norteamericano a 15mm, tanto
tropas, que ya son pocas las que me faltan, como vehículos.
Algunos de los tanques que tengo son heredados, otros pocos
son “frankenstein” (el monstruo, no el Dr.) y, en su mayoría, son montados de
varias marcas.
Las marcas de los que tengo son los propios de Battlefront,
tanto los de resina como los primeros de plástico que sacaron – sí, aquellos
que no hay manera que encajen bien a la primera y que se debe poner mucha masilla -, los de Plastic Soldier y
alguno de Zvezda.
Así es como los primeros Sherman acabaron en mi mesa que
quirófano, antes de dejarlos óptimos para entrar en combate.
For quite some
time now I have to finish my American army at 15mm, both troops, which are
already few that I lack, as vehicles.
Some of the tanks
that I have are inherited, a few are "frankenstein" (the monster, not
the Dr.) and, for the most part, they are assembled from various brands.
The brands that I
have are those of Battlefront, both the resin and the first plastic that took -
yes, those that there is no way to fit the first and that you must put a lot of
putty -, Plastic Soldier and some of Zvezda.
This is how
the first Sherman ended up in my table that surgery, before leaving them
optimal to enter combat.

Después de usar un espray de Army Painter color blindados
USA, quedaron más decentes y homogéneos, para poder jugar de una forma rápida.
Pero al final se han quedado demasiado tiempo, con el pintado provisional y ya
era hora de que pasaran por el taller para su nueva pintura.
After using a
spray of Army Painter color armored USA, they were more decent and homogeneous,
to be able to play in a fast way. But in the end they have stayed too long,
with the provisional painting and it was time for them to go through the
workshop for their new painting.

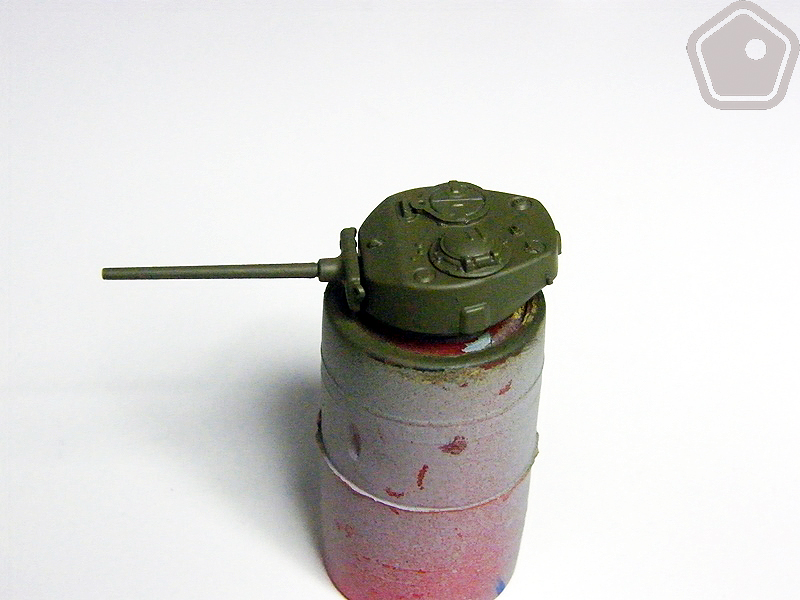
Aunque alguno de aquellos “recompuestos” no terminaron de
pintarse, como este 76mm, entre cuerpo de Battlefront y torreta de Plastic Soldier, que
usaré para está ocasión.
Although
some of those "recomposed" did not finish painting, like this 76mm,
between Battlefront body and Zvezda turret, which I will use for this occasion.

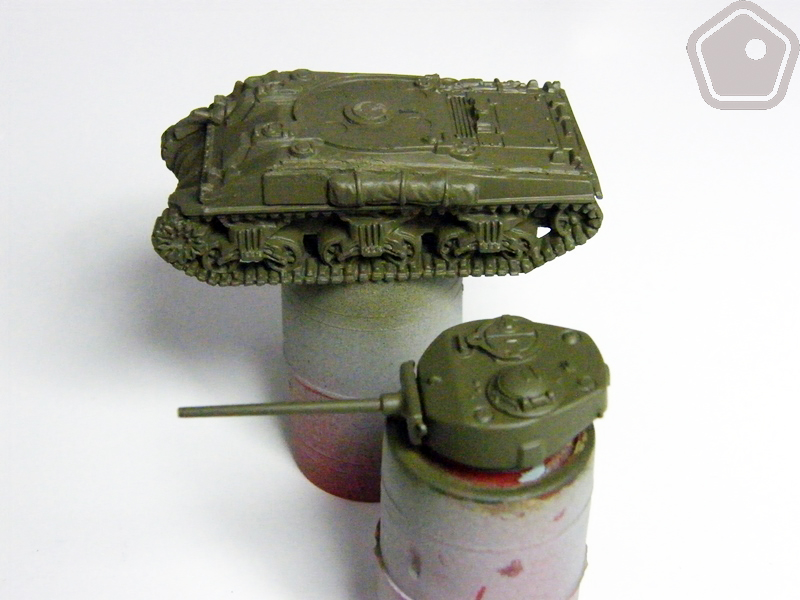
O el modelo Jumbo, que bien puede pasar por un E8
perfectamente, de Zvezda, el otro modelo a utilizar como muestra de este
artículo.
Or the
Jumbo model, which may well go through an E8 perfectly, Zvezda, the other model
to use as a sample of this article.

Eso si, antes de trabajar con ambos, y con otros 10 tanques
que pintaré simultáneamente, llenaré de masilla todas las zonas que no encajen
perfectamente.
Yo actualmente estoy utilizando la masilla plástica de
Vallejo (Ref 401), que puede ser encontrada en tubo metálico o en botella del
mismo formato que las pinturas.
Tambien podemos utilizar la de la marca Molak, Italeri o
Tamiya, todas conocidas con el nombre de Putty. Todas van para este menester,
exactamente igual.
Una vez tengamos tapadas todas las imperfecciones con
masilla y esta lijada para que no se note, he procedido a Imprimar las
miniaturas con imprimación Verde Oliva (Surface Primer 608), con aerógrafo.
El motivo para utilizar aerógrafo en el nuevo pintado de los
tanques, es porque voy a realizar una gradación
de luces con los colores que a continuación iré indicando. La graduación de
luces, nombre con el que durante muchos años se ha conocido a esta técnica, es
también conocida en la actualidad como “modulación”.
Para todos los trabajos con el aerógrafo, he estado usando
el compresor a una presión de 1’5 Bares.
La forma de aplicar las diferentes fases, dependerá del
modelo y la escala. Para 15mm yo he aplicado la técnica como a continuación
describo, aunque habrá otros pintores que prefieran realizarlo de otra forma.
En el modelo híbrido entre Battlefront con Plastic Soldier
(Modelo 1 a partir de ahora), como el color base del plástico del cuerpo es
gris o verde (Battlefront los ha hecho de los dos colores), el color verde
Oliva queda bastante homogéneo, aplicando una pasada del aerógrafo.
That yes,
before working with both, and with another 10 tanks that I will paint
simultaneously, I will fill with putty all the areas that do not fit perfectly.
I am currently
using the “Masilla Plástica” of Vallejo (Ref 401), which can be found in metal
tube or bottle in the same format as paints.
We can also use
the brand Molak, Italeri or Tamiya, all known by the name of Putty.
All go for this
need, exactly the same.
Once we
have covered all the imperfections with putty and this sanded so that it is not
noticed, I proceeded to print the miniatures with Olive Green primer (Surface
Primer 608), with airbrush.
The reason
to use airbrush in the new paint of the tanks, is because I will perform a
graduation of lights with the colors that I will indicate below. The graduation
of lights, name with which this technique has been known for many years, is
also known today as "modulation".
For all
work with the airbrush, I have been using the compressor at a pressure of 1.5
Bars.
The way to
apply the different phases will depend on the model and the scale. For 15mm I
have applied the technique as described below, although there will be other
painters who prefer to do it in another way.
In the hybrid
model between Battlefront with Plastic Soldier (Model 1 as of now), as the base
color of the plastic of the body is gray or green (Battlefront has made them of
the two colors), the olive green color is quite homogeneous, applying One pass
of the airbrush.

La torreta, al ser de un color más claro, ha necesitado una
segunda capa fina para cubrir bien.
The turret,
being a lighter color, has needed a second thin layer to cover well.
En el caso del modelo de Zvezda (Modelo 2 a partir de
ahora), como el plástico es muy amarillento, he tenido que aplicar dos capas. Y
aun así, no ha cubierto bien del todo. No aplico más, ya que no es cuestión que
se pierda el detalle del modelo. Pero no importa demasiado que se vea algo el
color del plástico, ya que en capas posteriores de los colores más claros, se solventará el
problema.
In the case of
the Zvezda model (Model 2 as of now), since the plastic is very yellowish, I
had to apply two layers. And even then, it has not covered well at all. I do
not apply more, since it is not a question that the detail of the model is
lost. But it does not matter too much that the color of the plastic is seen,
since in later layers of the lighter colors, the problem will be solved.

En la torreta, por un ligero error de incremento de
diluyente en la pintura, el efecto transparente de la imprimación se nota mucho
más. Pero en las siguientes fases, esto queda completamente solventado.
In the turret, by
a slight error of increase of diluent in the paint, the transparent effect of
the primer is much more noticeable. But in the following phases, this is
completely solved.


Para
las sombras en los tanques, aplico tambien con aerógrafo, y sin diluir la
pintura, el Oliva amarillo (Model Air 013), en los bajos del cuerpo del Modelo
1.
For the shadows
in the tanks, I also apply with airbrush, and without diluting the paint, the
yellow Oliva (Model Air 013), on the underside of the body of Model 1.

También en la rejilla del motor y en donde va la torreta.
Also in the motor
grille and where the turret goes.

Procedo de la misma forma en la torreta
Process in the same way in the turret


Hago exactamente lo mismo en el Modelo 2.


Después de aplicar la sombra, he aplicado la primera subida
de luz con el US Verde Oliva (Model Air 016), rebajado en algo más del 40%, para conseguir un efecto ligeramente
transparente, para no perder el color base.. Esta luz la aplicaré en la parte
superior, sólo donde más quiero que se vea la intensidad de las posteriores
subidas de color, y en los laterales, pero sin entrar en los bajos en los que
ya se ha aplicado el color oscuro.
En la siguiente foto se puede apreciar el Modelo 2, con este
color aplicado, y el Modelo 1, todavía sin tener esta luz aplicada. La
diferencia es considerable.
After applying
the shadow, I applied the first light rise with the US Olive Green (Model Air
016), reduced by just over 40%, to achieve a slightly transparent effect, so as
not to lose the base color. I will apply this light at the top, only where I
want to see the intensity of the subsequent color rises, and on the sides, but
without going into the shadows where the dark color has already been applied.
In the following
photo you can see the Model 2, with this color applied, and the Model 1, still
without having this light applied. The difference is considerable.

En las siguientes fotos se puede ver el efecto aplicado en
el Modelo 1.
In the following
pictures you can see the effect applied in Model 1.


En el Modelo 2, hago exactamente lo mismo.
In Model 2, I do exactly the same.


Hay que tener muy en cuenta que para que esta graduación de
luces (o modulación, como queráis llamarlo) sea efectiva y salga bien, las
capar siguientes a aplicar deben ser ligeramente transparentes, ya que debemos
dar luz a un color base, no volver a pintar encima con otro color.
El siguiente color a utilizar con el aerógrafo es el USAF
Verde Oliva (Model Air 016), también rebajado en algo más del 40%.
Este color sólo lo he aplicado de forma cenital, desde
arriba y a una distancia bastante más alejada de lo habitual. Debo dar una
sensación de luz. A mi no me gusta exagerar este efecto, como pasa en la
realidad, ya que podemos dejar la miniatura como si llevase un camuflaje
extraño encima.
It must be taken
into account that for this graduation of lights (or modulation, as you want to
call it) to be effective and work well, the following layers must be slightly
transparent, since we must give light to a base color, not return to paint over
with another color.
The next color to
use with the airbrush is the USAF Olive Green (Model Air 016), also reduced by
just over 40%.
This color I have only applied in a zenithal way, from above and at a distance much further than usual. I must give a feeling of light. I do not like to exaggerate this effect, as it happens in reality, since we can leave the model as if it had a strange camouflage on it.
This color I have only applied in a zenithal way, from above and at a distance much further than usual. I must give a feeling of light. I do not like to exaggerate this effect, as it happens in reality, since we can leave the model as if it had a strange camouflage on it.


Y, como no, también lo hago con el Modelo 2.
And I also do it with Model 2.


Ahora ya no se nota tanta diferencia entre un modelo y otro.
Now you can not
see much difference between one model and another.

Dejamos aparcado y limpio el aerógrafo, y empezamos a
utilizar el pincel.
Y lo primero que hago es mezclar el USAF Verde Oliva al 50%
con el Gris RLM02 (Model Air 044). Con esta mezcla me dedico a aplicarlo sobre
las escotillas y otras zonas que quiero resaltar la iluminación.
We left the
airbrush parked and cleaned, and we started using the brush.
And the first
thing I do is mix the 50% Olive Green USAF with the Gray RLM02 (Model Air 044).
With this mixture I dedicate myself to apply it on the hatches and other areas
that I want to highlight the lighting.


Y por
último aplico con pincel el Gris RLM02 sin mezclar, a modo de luz plana, allí
donde quiera que haya una iluminación o que quiera que algo resalte més de la
cuenta.
And finally I
apply with a brush the RLM02 Gray without mixing, as a flat light, wherever
there is an illumination or I want something to stand out more than the bill.


Como podéis observar, he optado por no aplicar pincel seco a
estos modelos, ya que no deseo hacer un desgaste de color. Eso lo realizaré más
adelante, con otras técnicas, que ya explicare en los artículos siguientes.
A veces utilizar técnicas que en modelos de escalas
superiores funcionan muy bien, pueden estropear el modelo de escalas
inferiores.
As you can see, I
have chosen not to apply dry brush to these models, since I do not want to make
a color wear. I will do that later, with other techniques, which I will explain
in the following articles.
Sometimes using
techniques that work in very high scale models, can damage the model of lower
scales.
Para seguir el trabajo, ver:
To continue the work, see:
Para seguir el trabajo, ver:
To continue the work, see:
- Parte 3ª - Pintado
de Tanquistas/Painting of Tankers.
- Parte 4ª - Calcomanías/Decal.
-
Parte 5ª - Perfilados/Profiled.
-
Parte 6ª - Desconchones/scratches.
-
Parte 7ª - Aguadas/Watery.
-
Parte 8ª - Suciedad
Acumulada/Accumulated Dirt.
-
Parte 9ª - Aceite,
Combustible y Grasa/Oil, fuel and grease
-
Parte 10ª - Orugas/Tracks
-
Parte 11ª - Barro/Mud
- Parte 12ª – Anteans
y Final/Antennas & end
Salva Rosselló


No hay comentarios:
Publicar un comentario