

Vamos a colocar las calcomanías a los tanques.
We're going to put the decals to the tanks.
Un poco de historia - A little history
Los tanques que quiero representar son del oeste de Europa,
Normandía.
Para ello debemos tener en cuenta que en este escenario bélico,
prácticamente todos los tanques llevaban las estrellas sin círculos, excepto la
frontal y superior en torreta.
La estrella frontal, dependiendo de la división, llevaban o
no circulo alrededor de la estrella. Esto se debe que unidades que estuvieron en
Italia y fueron destinadas tanto en el desembarco de Normandía, como
posteriormente para el avance hacia Holanda, dejaron estas estrellas como signo
de identidad, más que como identificación. Posteriormente, a partir de la
Operación Market Garden, todos los tanques dejaron de llevar esta “diana” en el
frontal, dejando de forma aleatoria la estrella sin el círculo o simplemente sin
estrella.
La estrella superior pequeña con circulo en la torreta los
tanques norteamericanos, la siguieron llevando hasta el final de la contienda,
para el reconocimiento aéreo.
Comentar antes que nada que los tanques británicos y commonwealth
, ante la creencia que llevaban muchas “estrellas” como los USA, estos sólo
llevaban el identificador superior aéreo. Pero en el escenario del Oeste de
Europa, sólo llevaban una gran estrella con circulo sobre el motor. El resto de
identificadores son los determinados por el ministerio de guerra británico.
The tanks I want to represent are from Western Europe, Normandy.
For this we must bear in mind that in this war scenario, practically all tanks carried the stars without circles, except the front and top turret.
The frontal star, depending on the division, carried or not circled around the star. This is because units that were in Italy and were intended both in the Normandy landings, and later for the advance to Holland, left these stars as a sign of identity, rather than as identification. Subsequently, from Operation Market Garden, all tanks stopped carrying this "target" on the front, randomly leaving the star without the circle or simply without a star.
The small top star with a circle in the turret, the North American tanks, continued to carry it to the end of the contest, for aerial reconnaissance.
Comment
first that the British tanks and commonwealth, in the belief that they
had many "stars" like the USA, they only wore the upper air identifier. But on the Western European stage, they only carried a big star with a circle on the engine. The rest of the identifiers are those determined by the British Ministry of War.
Posicionamiento de
los distintivos - Positioning of the badges
La posición de las estrellas y otros identificadores es la
siguiente.
The position of the stars and other identifiers is as follows.
The position of the stars and other identifiers is as follows.

No es del todo cierto este dibujo, en especial la estrella
superior sin circulo, más propio de la guerra de Corea, pero me sirve para
indicar la posición de las estrellas en este periodo de la guerra.
Al final he optado por colocar solamente las estrella, la
matrícula y el indicador “30” del peso del Sherman. Los indicativos de unidad no los he colocado, ya que no tengo para todos los tanques. Battlefront no suele suministrarlos.
En la siguiente imagen, aunque pertenece a los blindados
polacos, pero me sirve para que se vea en que posición iba la estrella
superior, dependiendo si llevaban escotillas superiores o no.
This drawing is not entirely true, especially the top star without a circle, more typical of the Korean War, but it helps me to indicate the position of the stars in this period of the war.
In the end I chose to place only the stars, the license plate and the "30" indicator of the weight of the Sherman. I have not placed the unit codes, since I do not have all the tanks. Battlefront does not usually supply them.
In the following image, although it belongs to the Polish armor, but it helps me to see what position the top star was in, depending on whether they had upper hatches or not.

Preparativos - Preparations
Para colocar bien las calcomanías, “eliminando” el molesto
reborde, y dejarlo preparado para los perfilados, barnizo con brillo todas las
piezas.
Para esta ocasión, y por comodidad, he utilizado un barniz
brillante acrílico en espray que tengo.
To place the stickers correctly, "eliminating" the annoying flange, and leaving it ready for the profiles, I varnish with brilliance all the pieces.
For this occasion, and for convenience, I used a glossy acrylic spray varnish that I have.

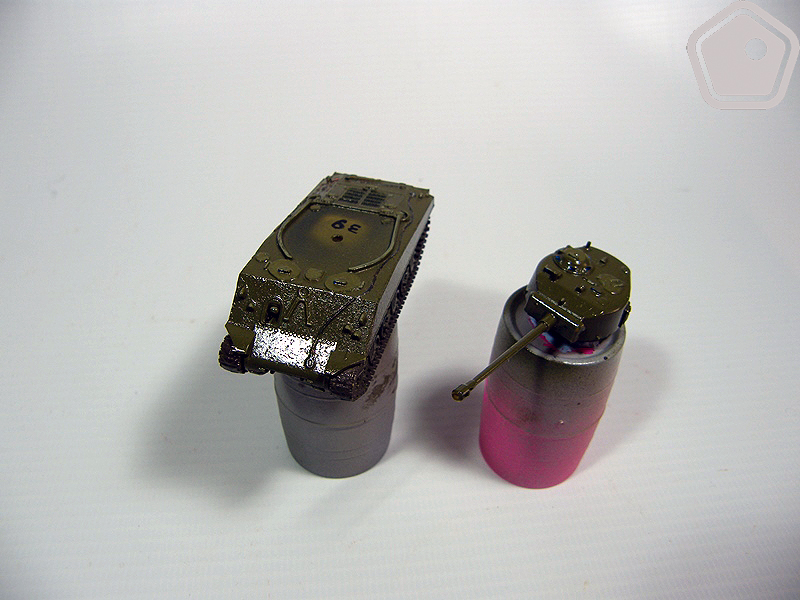
El resultado es este.
The result is this.


Herramientas y
Material - Tools and Material
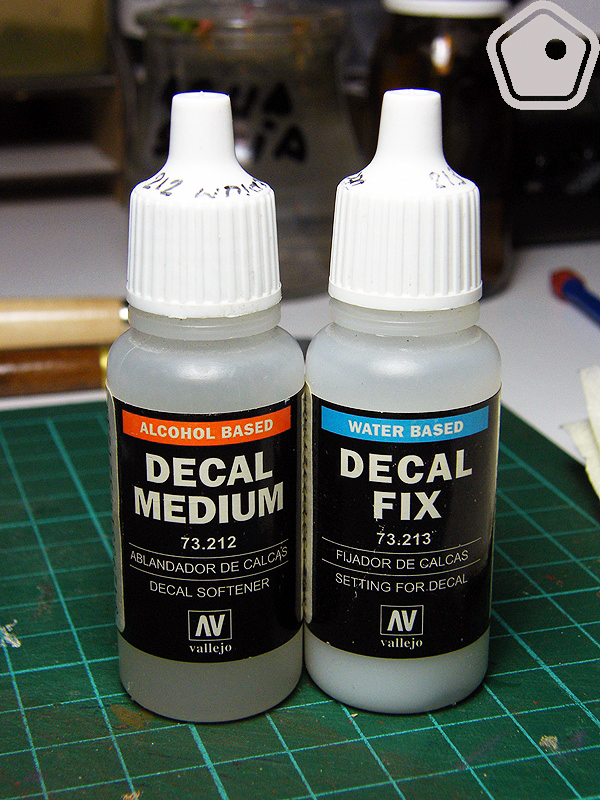
Para colocar las calcomanías, he utilizado el ablandador y
el fijador de calcas de Vallejo.
To place the decals, I used the softener and the decals fixer from Vallejo.
También utilizaré diversas herramientas y otros elementos.
I will also use different tools and other elements.

Estos son, de izquierda a derecha:
- Recipiente con agua. Por “manía” utilizo la parte
transparente de un blíster, bastante estándar en muchos fabricantes hace años,
ya que la parte inclinada me ayuda a sacar las calcas del agua, entre otros
menesteres.
- Calcomanías (evidentemente).
- Cuchilla de modelista. Esta me sirve para cortar la calca
de su hoja y para poder sacarla del agua, mediante el pinchado con la punta de
la cuchilla (eso sí, en alguna zona donde no esté la calca), para poder
colocarla sobre la pieza donde se colocará definitivamente.
- Herramientas de punta de silicona, para ayudarnos a
desplazar la calca sin romperse.
These are, from left to right:
- Water container. By "mania" I use the transparent part of a blister, quite standard in many manufacturers for years, since the inclined part helps me to take the decals from the water, among other things.
- Decals (obviously).
- Modeller's blade. This serves to cut the decal of your blade and to be able to remove it from the water, by pricking with the tip of the blade (yes, in some area where the decal is not), to be able to place it on the piece where it will definitely be placed .
- Silicone tip tools, to help us move the decal without breaking.
Proceso de colocación
de calcas - Decal placement process
Para empezar cortaremos las calcas de forma individual para
su posterior colocación.
To begin we will cut the decals individually for their subsequent placement.

O en parejas, como en el caso de las matrículas, que son
iguales dos a dos.
Or in pairs, as in the case of license plates, which are equal two to two.

Colocamos la calca un rato, el suficiente para que la calca
se separe de la base de cartón, pero sin dejar que esta flote en el agua.
Place the decal for a while, enough for the decal to separate from the cardboard base, but without letting it float in the water.

Para la colocación de la calca, primero aplicaremos el
ablandador en la superficie donde irá la calca (si es necesario). Este
ablandador lo que hará es dejar “blanda” la calca para que esta se adapte a la
superficie. Si la calca es muy antigua, está estará muy rígida y, aunque la
superficie esté impregnada de este ablandador,
puede llegar a romperse. Para evitar esto, lo mejor es una vez tengamos
colocada la calca en su sitio, y antes de adaptarla a la superficie con curvas,.
Bisagras, manetas,…, mojar la calca en la solución de ablandador y esperar un
rato para que actúe sobre la calca.
Un dato a tener en cuenta; el ablandador vuelve mate la zona
donde la hayamos colocado (como se ve en las siguientes fotos),
Para poder colocar la calca en su posición, la superficie
debe estar mojada. Para desplazarla y girarla hasta la posición deseada
aconsejo utilizar las herramientas o pinceles de punta de silicona.
For the placement of the decal, first we will apply the softener on the surface where the decal will go (if necessary). This softener will make the decal "soft" so that it adapts to the surface. If the decal is very old, it will be very rigid and, even if the surface is impregnated with this softener, it can break. To avoid this, the best thing is once we have placed the decal in its place, and before adapting it to the curved surface. Hinges, handles, ..., wet the decal in the softener solution and wait a while to act on the decal.
A fact to be taken into account; the softener turns matt the area where we have placed it (as seen in the following photos),
In order to place the decal in its position, the surface must be wet. To move and rotate it to the desired position, I recommend using tools or silicone tip brushes.

Calcas colocadas - Decals placed
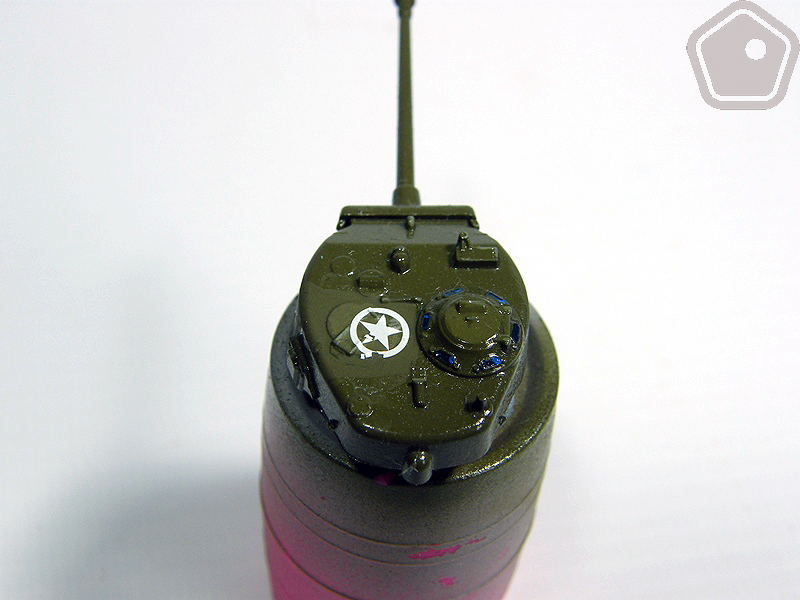
Una vez colocadas las calcas, los tanque están así.
Once the decals are placed, the tanks are like this.

El primer tanque de 76mm.
The first tank of 76mm.


El segundo tanque de 76mm.
The second tank of 76mm.


Para
seguir el trabajo, ver:
To continue the work, see:
- Parte 3ª - Pintado
de Tanquistas/Painting of Tankers.
- Parte 4ª - Calcomanías/Decal.
-
Parte 5ª - Perfilados/Profiled.
-
Parte 6ª - Desconchones/scratches.
-
Parte 7ª - Aguadas/Watery.
-
Parte 8ª - Suciedad
Acumulada/Accumulated Dirt.
-
Parte 9ª - Aceite,
Combustible y Grasa/Oil, fuel and grease
-
Parte 10ª - Orugas/Tracks
-
Parte 11ª - Barro/Mud
- Parte 12ª – Anteans
y Final/Antennas & end
Salva Rosselló


No hay comentarios:
Publicar un comentario